Creating and configuring a new OHS instance
-
On https://portal.itrontotal.com, navigate to Current tenant > On-premises Hybrid Service.
-
Click the Add icon (
 ). In the dialog that appears, enter a unique instance name (for example, VEC_PROD01), owner(s), and a description.
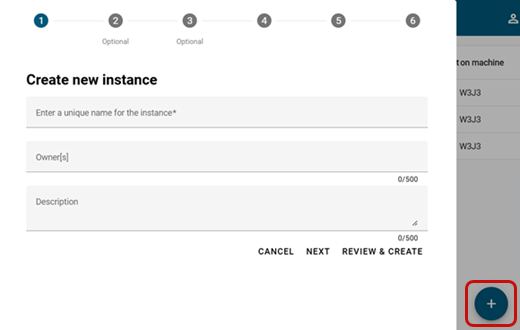
Click Next.
-
Select a Data source and the Outcome(s) to enable for the new OHS instance.
Note: The available options represent the combinations that share a published default configuration template. If an outcome option is disabled, either no configuration has been published or the combination is not supported.
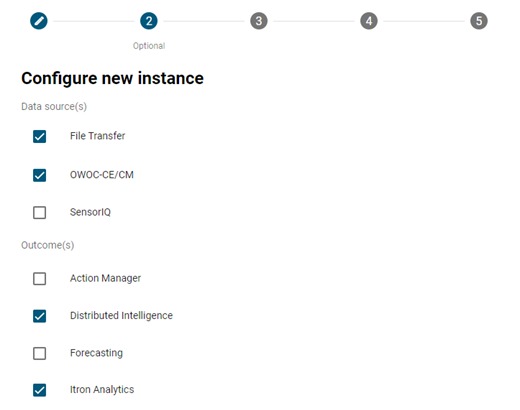
Click Next.
-
In the Email field, provide one or more email addresses to receive health-check-failure and instance-deleted notifications.
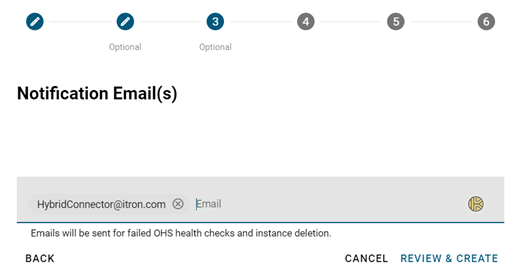
Click Review & Create.
-
Review the OHS instance name and configuration selection.
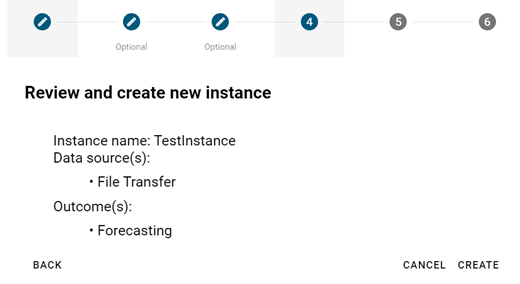
If everything is correct, click Create. To make changes, click Back to return to the previous step.
-
Review the status of the created configuration. This screen displays the latest released version of OHS. Click the Release Notes link to view the online release notes (may require sign-in credentials).
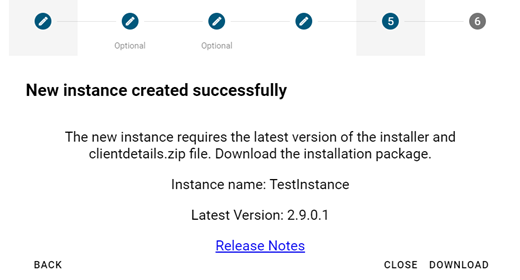
Click Download to select the option to download the installer now.
Tip: If you wish to download the OHS installer later, click Close. You can download the installer from main OHS page (Hybrid Connector > On-premises Hybrid Service). Click Actions (
 ) on the instance row and select Download latest installer. See also Downloading the installation package.
 -
Click the download icon (
 ) to begin the OHS installer download.
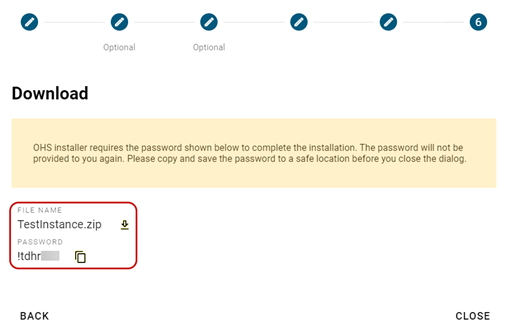
-
Click the Copy icon (
 ) to copy the password to your clipboard. Be sure to paste the copied password to a secure location. This password is required for opening the text file within the ClientDetails.zip file, included in the installation package.
 Important! Once you close the dialog, you will not be able to retrieve this password. If you close it by mistake, you must download the zip file again. To do this, click Actions (
) on the instance row and select Download Client ID & Secret. A new password will be generated upon download. -
Once the download is complete and your password is copied and saved to a secure location, click Close to complete the new OHS instance addition. You will have a zip file with the OHS instance name. This file will be in your browser's default download location and contains the following files:
-
Itron.Platform.OHS_2.x.x.exe. Executable OHS installer, where x indicates the version number.
-
ClientDetails.zip. This zip file that contains a password-protected text file that provides the clientId and clientSecret, which are needed for OHS to access the proxy service.
-
Environment.json. Contains the environment URLs. The URLs change for each of the environments; this file helps you avoid making manual edits during configuration.
-
InstanceDetails.json. Contains a unique ID that identifies the OHS instance.
-
The newly added OHS instance should now appear on the OHS Dashboard (Hybrid Connector > On-premises Hybrid Service). The status of the OHS will show as NotApplied. After you have installed OHS successfully, the status should change to Configured.